Stereoscopic
3D imaging provides depth to pictures by simulating the different
views seen by each eye. While the concept is as old as photography,
it has gained an unprecedented amount of support in the last two years
from the entertainment and consumer electronics industry. A growing
number of major movies are being filmed in 3D, major video games are
being released in 3D, all major TV and monitor manufacturers are
making 3D TVs and Nintendo has released a 3D version of their hand
held game console. All of these are potential viewing devices for 3D
images.
All
stereoscopic 3D images, whether still or video, consist of two
separate views in which elements are positioned differently depending
on how deep they are in the scene. Viewing a stereoscopic 3D image
requires a method to allow each eye to see only one of the two
images. Here are the most common methods for viewing stereoscopic
content:
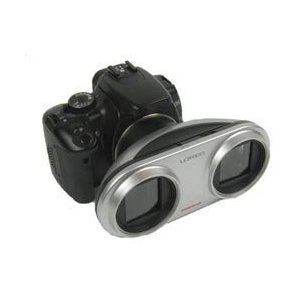
Parallel
View – Parallel view consists of placing the left and right images
side-by-side on a monitor or printed card. While some users are able
to fuse the two images into a single 3D image on their own, most
require a viewer to help focus each eye on the correct image. One of
the simplest and most effective is the Loreo Pixi viewer which
consists of two prisms mounted in a folding cardboard glasses frame.
Using the Loreo viewer, any computer monitor can be used to display 3D content.
 |
| The Loreo Pixi 3D Viewer |
Red/Cyan
Anaglyph – An anaglyph image applies a red cast to one view and a
cyan cast to the other. Glasses with red and cyan lenses filter the
views for each eye. This is one of the easiest and cheapest methods
because the images can be displayed on any device and cardboard
red/cyan glasses can be purchased in bulk for about $.50. However,
the quality is poor. The method distorts the color of the image and
there is frequently ghosting because the filters in the glasses do
not match the display color.
 |
| Anaglyph image of a bird in flight. |
Passive
Sequenced – The 3D movies currently shown at theaters use the
passive sequenced method where the left and right images are
projected one at a time in rapid sequence through filters polarized
at opposing angles. The viewer wears glasses with polarized lenses
to filter the images to each eye. This viewing method is also used
with some consumer level 3D projectors.
Passive
Interlaced – The passive interlaced method requires building the
polarized filters into a TV monitor in strips. The right and left
images are interlaced into the strips and the viewer wears polarized
glasses to filter the images to each eye. This method is being used
by some high end 3D TVs, but it adds significant cost to the
production of the TV. As the costs come down, this may become the
preferred technology for 3D in the living room because the glasses
are inexpensive and do not require charging.
 |
| Toshiba Laptop with Active Shutter Glasses |
Active
Shutter Sequenced – Most of the 3D TVs that are in the stores
currently use the active shutter sequenced method. The right and
left images are shown in rapid sequence and the user wears a pair of
glasses with LCD shutters which turn on and off in sync with the
screen refresh on the TV monitor. This is the least expensive
technology right now for the home because it does not require
significant changes or additional costs for the monitor. The
disadvantage, particularly in households with children, is the need
for keeping the batteries in the glasses charged and the replacement
costs if the glasses get lost or broken.
 |
| The Nintendo 3DS uses a parallax barrier to show 3D content. |
Parallax
Barrier – The Nintendo 3DS hand held gaming console, the display
on the Fuji 3D camera and a number of recently announced 3D laptop
computers have parallax barrier screens. With this method, the left
and right images are interlaced onto an LCD screen. A second LCD
screen layer creates a series of lines which keep each eye from
seeing the images intended for the other eye. This approach is
autostereoscopic which means that it works without any type of 3D
glasses. However, the user has to be at a particular distance from
the screen and at a particular angle to experience the 3D effect
which limits its application to small, single-user devices.
Lenticular
– Lenticular printing is not really a stereoscopic display method
but instead mimics the effect of stereoscopic viewing. For lenticular
printing, typically 12 to 24 images are interlaced into a single
print which is laminated onto a special lens to allow the viewer to
see different views as the image is rotated. To create a lenticular
print from the left and right views of a stereoscopic 3D image,
special software must be used to create the intermediate views.
Although there are many ways to view 3D content, I usually post images as a 3D stereo pair and a red/cyan anaglyph. This makes them accessible to readers with the least expensive viewing tools.
How do you prefer to watch 3D content?